Refinishing the Mahogany Wainscoting
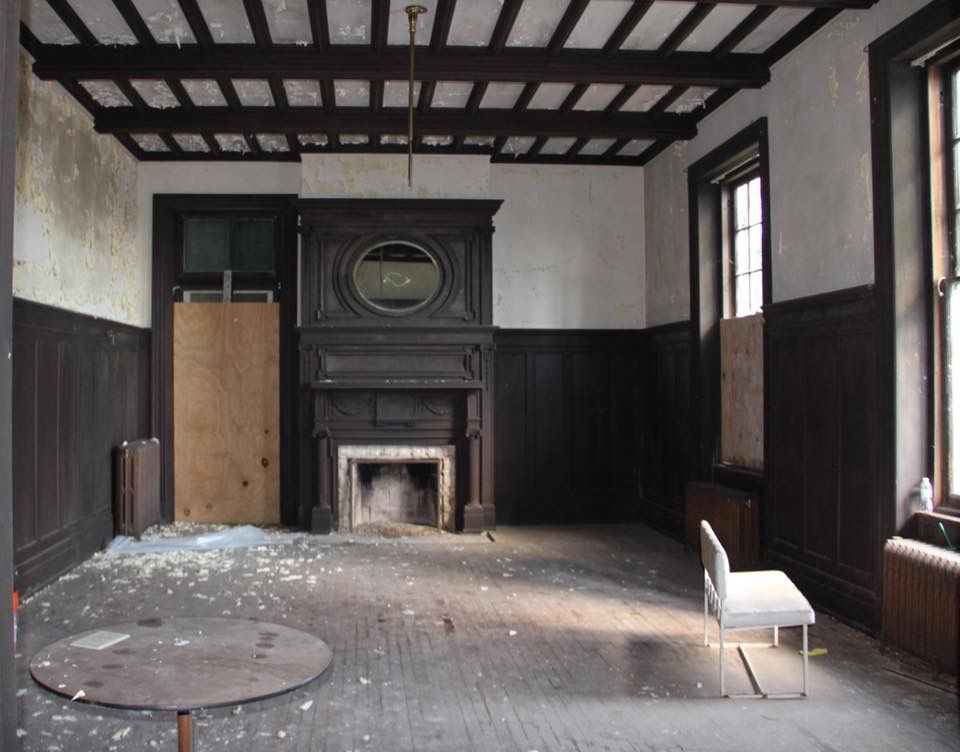
The mahogany wainscoting was a centerpiece of the dining room’s character, but its condition told the story of decades of neglect. The blistered lacquer finish trapped years of dust and grime, masking the wood’s beauty. Restoring it was a labor-intensive but incredibly rewarding process.
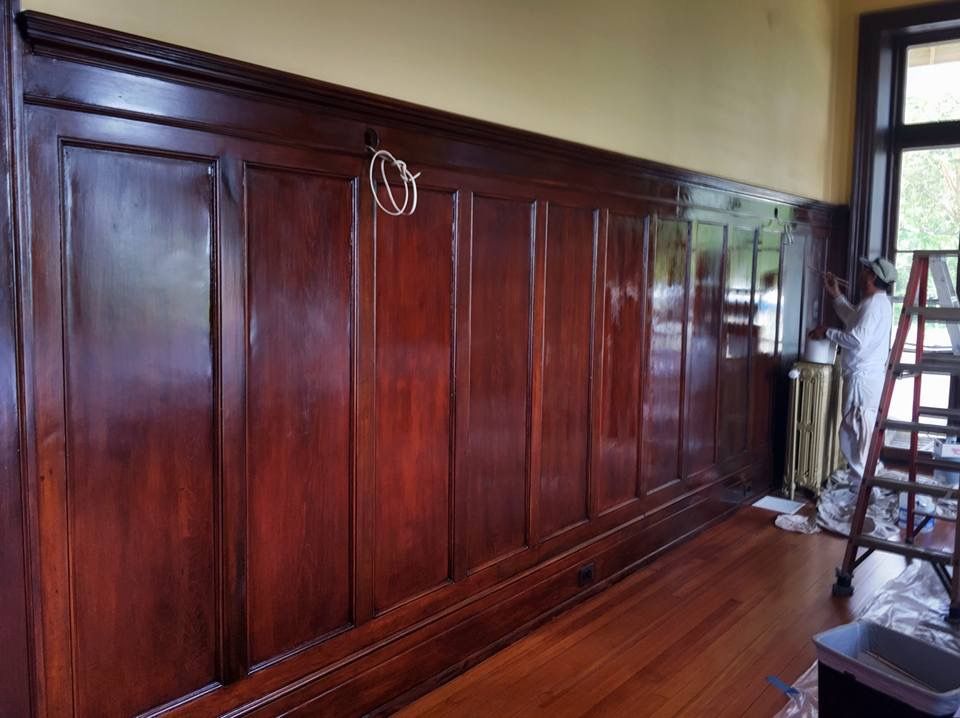
We began by stripping away the old lacquer, a process that revealed the true potential of the wood underneath. This step was especially painstaking, as every crevice needed attention to remove years of buildup. The old lacquer had formed a pimpled surface that clung stubbornly to the mahogany, but with persistence, the wainscoting’s rich grain began to emerge.
Once the wood was stripped bare, we addressed its uneven color. The original stain had faded in some areas and deepened in others, creating an inconsistent appearance. To resolve this, we carefully bleached the wood to neutralize the old stain, providing a clean slate for the next steps. After bleaching, the surfaces were sanded down to achieve a smooth, even finish, free of imperfections.
Creating the perfect stain was an art in itself. The owners wanted the wainscoting to reflect the room’s historical roots without looking overly polished or artificial. Onsite, we mixed various stain colors, testing and adjusting until we achieved a tone that felt authentic and aged. The application was equally meticulous—each layer of stain was applied evenly and allowed to dry completely before moving on. This gradual process ensured depth and dimension in the final finish.
After staining, we sealed the wood to lock in the color and provide a foundation for the final protective coating. Sanding followed, with every surface meticulously smoothed to ensure a flawless finish. Finally, we applied an oil-based polyurethane, enhanced with a touch of umber pigment. This subtle addition gave the finish a warm, historic glow, perfectly complementing the room’s aesthetic.
Restoring the Coffered Wood Ceiling
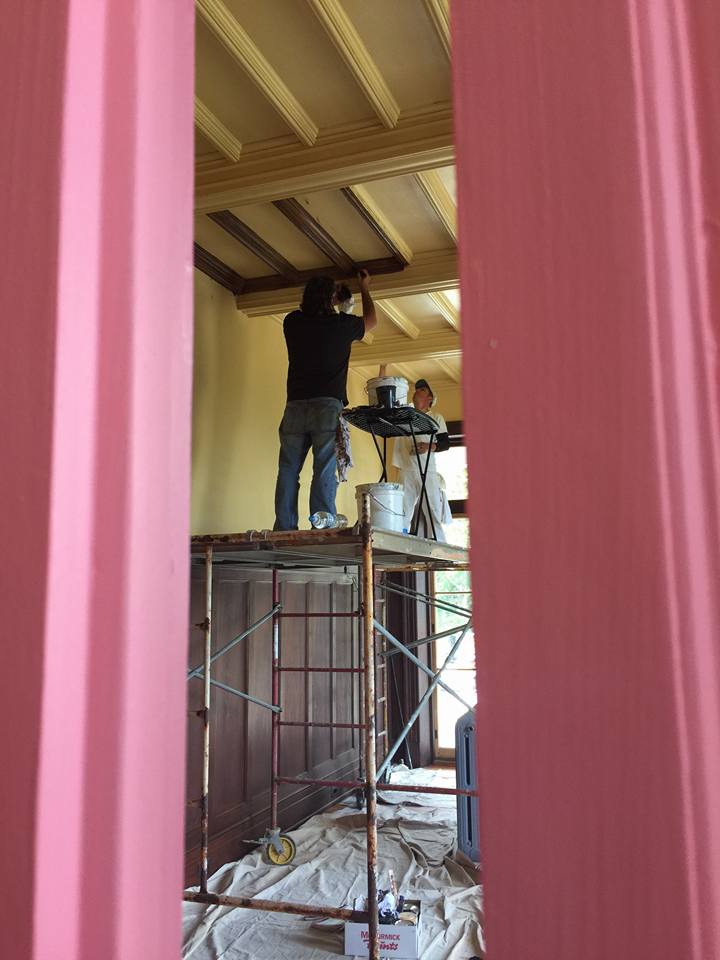
The coffered wood ceiling in the dining room presented another significant challenge. Decades of water damage had left its mark, warping and staining the once-majestic mahogany panels. The first step was to prepare the surface by sanding the wood smooth and addressing the areas beyond repair. Where necessary, we replaced damaged panels to ensure structural integrity while preserving as much of the original wood as possible.
Once the preparation was complete, I began the intricate process of recreating the look of mahogany. This started with a base coat that provided a uniform foundation. I then applied multiple layers of glaze, each one carefully manipulated with a variety of brushes to mimic the natural grain and depth of aged mahogany. This wasn’t a task to rush—each layer had to dry thoroughly before adding the next, allowing me to build the richness and texture characteristic of the original finish.
To enhance the authenticity, I used specialized tools and techniques to create subtle variations in tone and texture, ensuring the ceiling did not look freshly painted but instead like a restored relic of history. The final step was applying a protective topcoat to seal the work and give the ceiling a soft, lustrous finish that reflected the room’s grandeur.
Bringing the Dining Room to Life
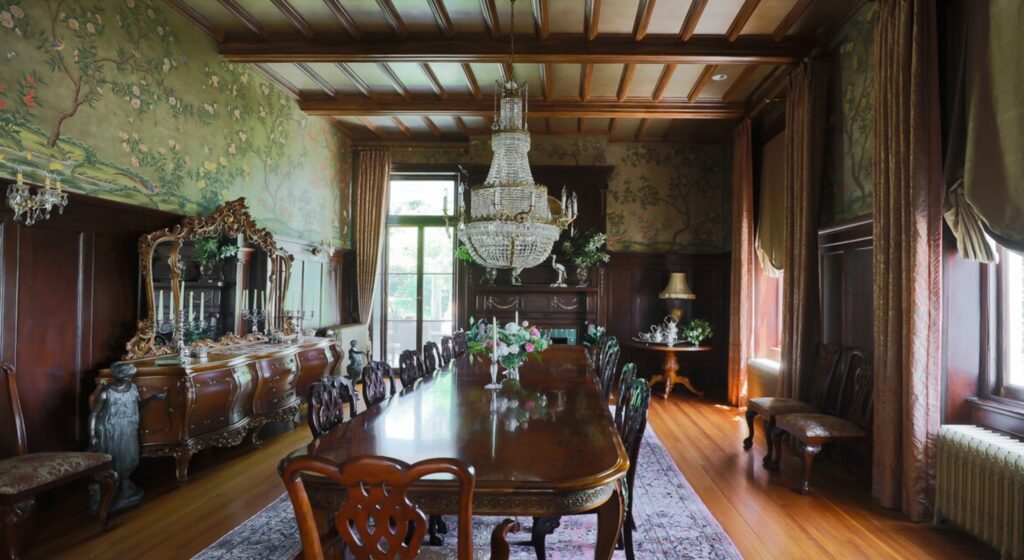
The dining room at Selma Mansion now radiates warmth and sophistication. The restored wainscoting and ceiling stand as testaments to the care and artistry that went into bringing this historic space back to life. From the rich tones of the mahogany to the intricate details of the ceiling, every element contributes to the room’s timeless beauty. It’s deeply gratifying to see this once-neglected space transformed into a room worthy of Selma Mansion’s storied legacy.
